Mastering Brand Presentation with a Realistic Building Wall Logo Mockup
In the competitive landscape of graphic design and brand identity, the gap between a digital concept and a physical reality is often where client confidence is won or lost. A Realistic Building Wall Logo Mockup serves as a critical bridge in this process, allowing designers to visualize how a logo will appear in a tangible, architectural context. Unlike flat presentations or isolated vector files, these mockups provide environmental context, lighting dynamics, and material textures that mimic real-world installation. This level of detail is not merely aesthetic; it is a functional tool for evaluation, helping stakeholders understand scale, contrast, and visual impact before any physical production begins.
The core value of using a high-quality mockup lies in its ability to simulate realism through advanced digital techniques. When you utilize a template equipped with smart object replacement, you are leveraging a system designed to automatically adjust shadows, highlights, and perspective. This means that your design does not simply sit on top of an image; it interacts with the surface. The texture of the concrete, brick, or stone becomes part of the logo’s appearance, creating a cohesive and believable representation. For professionals who need to present ideas to clients who may lack technical design knowledge, this visual clarity is indispensable.
Evaluating the Technical Advantages of Smart Object Integration
One of the most significant features of a premium Realistic Building Wall Logo Mockup is the integration of smart objects within Adobe Photoshop. This technology transforms what could be a hours-long editing task into a matter of seconds. Without smart objects, a designer would need to manually warp, distort, and blend layers to match the perspective of a building wall. This requires a high degree of skill and time. With smart object functionality, the process is streamlined: you open the designated layer, paste your artwork, save, and the software automatically applies the necessary transformations.
This automation ensures consistency and accuracy. The mockup handles the complex calculations required to make the logo look like it is painted on, mounted, or engraved into the wall. The lighting effects, including ambient occlusion and directional shadows, are pre-baked into the template but remain responsive to your input. This means that whether your logo is bright white or dark black, the mockup adjusts the surrounding tones to maintain realism. For users with varying levels of expertise, this removes the barrier of entry. You do not need advanced 3D modeling skills or extensive knowledge of lighting theory to achieve a professional result.
- Efficiency: Drastically reduces turnaround time for client presentations.
- Accessibility: Allows junior designers or non-designers to produce high-end visuals.
- Consistency: Ensures that every variation of a logo is presented under identical lighting conditions.
Comparing Mockups to Other Visualization Methods
When deciding how to present a brand identity, designers often weigh several options. Traditional methods include flat digital proofs, simple overlay composites, or full-scale 3D rendering from scratch. Each approach has distinct tradeoffs regarding cost, time, and realism. A Realistic Building Wall Logo Mockup occupies a strategic middle ground, offering high fidelity without the prohibitive costs associated with custom 3D development.
Flat digital proofs are quick to generate but often fail to convey how a logo interacts with its environment. They can look sterile and disconnected from reality, making it difficult for clients to imagine the final product. On the other end of the spectrum, creating a custom 3D scene from scratch provides ultimate flexibility but requires specialized software, significant rendering time, and advanced technical skills. For most branding projects, this level of effort is unnecessary and inefficient.
Using a pre-made, high-quality PSD template offers the best balance. It provides the photorealism of a 3D render with the ease of use of a 2D image editor. The key distinction here is the quality of the source image. A generic, low-resolution photo will not yield convincing results, regardless of the editing skills applied. Therefore, selecting a mockup that boasts 300 DPI resolution and well-organized layers is crucial. High resolution ensures that details remain sharp even when zoomed in, while organized folders allow for easy customization of background elements if needed.
Best-Fit Scenarios and Practical Applications
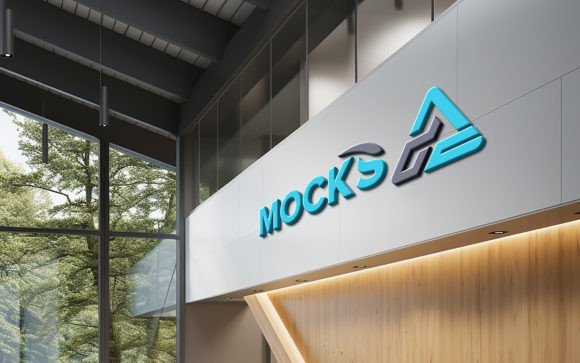
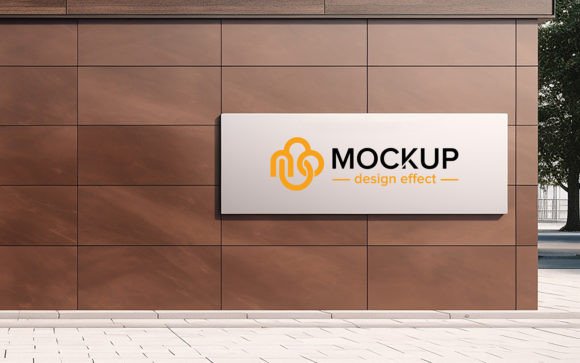
Understanding when to deploy a building wall mockup is essential for maximizing its utility. These tools are particularly effective in specific scenarios where context drives decision-making. For instance, when designing signage for retail storefronts, corporate headquarters, or urban installations, the texture of the building material plays a vital role in the overall aesthetic. A sleek, modern logo might look striking against smooth concrete but could get lost against rough brick. A realistic mockup allows you to test these combinations quickly.
Another practical application is in portfolio development. Designers competing for high-value contracts need to demonstrate not just their ability to create a logo, but their understanding of how that logo lives in the world. Including a Realistic Building Wall Logo Mockup in a portfolio shows prospective clients that you think beyond the screen. It suggests professionalism and attention to detail, traits that are highly valued in the industry.
Furthermore, these mockups are invaluable for internal team reviews. When discussing potential directions for a rebrand, seeing a logo on a familiar architectural structure can spark more productive conversations than viewing it on a white background. It helps stakeholders visualize scale and presence, leading to faster consensus and fewer revision cycles.
Limitations and Decision Factors
While highly effective, it is important to recognize the limitations of static mockups. They are fixed perspectives. If a client needs to see the logo from multiple angles or in different lighting conditions (such as night versus day), a single PSD file may not suffice. In such cases, you might need a pack that includes multiple variations or consider a more dynamic 3D solution. Additionally, while smart objects handle perspective and lighting automatically, they cannot account for complex physical obstructions or irregular surface deformities that are not part of the original photo.
When evaluating a mockup resource, consider the following factors:
- Layer Organization: Ensure the file is fully layered with clear folder structures. This makes it easier to isolate elements if you need to tweak the background or adjust color balances.
- Resolution and Quality: Look for files that are at least 300 DPI. Lower resolutions may appear pixelated when printed or viewed on high-density displays.
- Lighting Realism: Examine the sample images closely. Do the shadows look natural? Is the lighting consistent with the environment? Poorly lit mockups can make even the best logos look amateurish.
- Ease of Editing: The claim of "no skill requirement" should be tested. Open the smart object and verify that the replacement process is intuitive and does not require manual masking or warping.
Making the Right Choice for Your Workflow
Integrating a Realistic Building Wall Logo Mockup into your workflow is a strategic decision that enhances both the quality of your output and the efficiency of your process. It is not merely a cosmetic addition but a functional asset that aids in communication, evaluation, and persuasion. By choosing a high-quality, smart-object-enabled template, you empower yourself to present designs with confidence and clarity.
For those who frequently present branding concepts, investing in a diverse library of mockups is wise. Having options ranging from industrial concrete walls to elegant stone facades allows you to tailor the presentation to the specific brand personality. Remember, the goal is not to deceive the viewer into thinking the sign is already installed, but to provide a realistic approximation that facilitates better decision-making. When used correctly, these tools elevate the perceived value of your design work and streamline the path from concept to approval.
Ultimately, the choice between using a mockup, a flat proof, or a custom 3D render depends on the project’s specific needs, budget, and timeline. For the majority of branding and signage projects, the Realistic Building Wall Logo Mockup offers the optimal blend of realism, ease, and professional polish. It enables designers to focus on creativity rather than technical execution, ensuring that the final presentation is as impactful as the design itself.